How Do I Connect a Wireless Mouse to a Laptop: Easy Step

Are you struggling to connect your wireless mouse to your laptop? You’re not alone.
It can feel frustrating when your mouse doesn’t respond or your laptop won’t recognize it right away. But don’t worry—connecting a wireless mouse is easier than you think. In this guide, you’ll discover simple, step-by-step instructions that make the process smooth and quick.
By the end, you’ll be ready to navigate your laptop with ease and enjoy the freedom of wireless control. Keep reading, and let’s get your mouse connected in no time!

Credit: www.youtube.com
Prepare Your Devices
Before connecting your wireless mouse to a laptop, you need to prepare both devices. This step makes the connection process smooth and fast. Preparing devices helps avoid common issues like no response or poor connection.
Check Battery And Power
Start by checking the mouse’s battery. Most wireless mice use AA or AAA batteries. Open the battery compartment and see if batteries are inside. Replace old batteries with fresh ones. Some mice have a built-in rechargeable battery. Make sure it is fully charged. Turn on the mouse using the power switch. If there is no power button, the mouse turns on automatically when you insert the batteries.
Locate Usb Receiver Or Bluetooth Settings
Look for the USB receiver if your mouse uses one. It is a small USB device that connects to the laptop. Usually, it is stored inside the mouse or in the mouse box. Plug it into your laptop’s USB port. If your mouse connects via Bluetooth, open your laptop’s Bluetooth settings. Turn Bluetooth on and make the laptop discoverable. This step allows the mouse and laptop to find each other easily.

Credit: www.youtube.com
Connect a Wireless Mouse to a Laptop Via Usb Receiver
Connecting a wireless mouse to a laptop using a USB receiver is simple and fast. This method uses a small receiver that plugs into your laptop’s USB port. The receiver sends signals between the mouse and laptop. No extra software is usually needed. Follow these easy steps to get started quickly.
Connect a wireless mouse to a laptpo-Plug In The Receiver
Find the small USB receiver that came with your mouse. Insert it into an empty USB port on your laptop. The port is usually on the side or back of the laptop. Make sure it fits securely. Your laptop should detect the receiver right away.
Turn On The Mouse
Locate the power switch on the mouse. It is often on the bottom side. Slide the switch to the ON position. Some mice have a light that turns on to show power. Make sure the mouse has batteries or is charged.
Wait For Automatic Installation
Once the receiver is plugged in and the mouse is on, your laptop installs drivers automatically. This process takes a few seconds. You might see a notification that the device is ready. After installation, the mouse cursor should move on the screen.
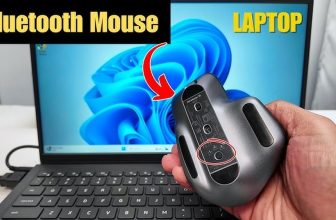
Connect a Wireless Mouse to a Laptop Via Bluetooth
Connecting a wireless mouse to your laptop using Bluetooth is simple and quick. Bluetooth technology allows devices to connect without wires, giving you more freedom to work or play. Follow these steps to connect your mouse via Bluetooth and enjoy a clean, cable-free workspace.
Enable Bluetooth On Laptop
First, turn on Bluetooth on your laptop. Click the Start menu and open Settings. Select Devices, then Bluetooth & other devices. Switch Bluetooth to On. Your laptop is now ready to find your wireless mouse.
Put Mouse In Pairing Mode
Next, activate pairing mode on your wireless mouse. Usually, press and hold the power or Bluetooth button until a light blinks. This blinking means the mouse is ready to connect. Check your mouse manual if you are unsure how to do this.
Pair And Confirm Connection
Go back to your laptop’s Bluetooth settings. Click Add Bluetooth or other device, then Bluetooth. Find your mouse name in the list and select it. Wait a few seconds for pairing. Once connected, a message will confirm the connection. Test your mouse to ensure it works properly.

Credit: windowsreport.com
Frequently Asked Questions
How Do I Connect A Wireless Mouse To A Laptop?
To connect, turn on your wireless mouse and enable Bluetooth on your laptop. Search for devices, select your mouse, and pair it. If using a USB receiver, plug it into the laptop and turn on the mouse. It connects automatically.
What If My Laptop Doesn’t Detect The Wireless Mouse?
Ensure the mouse is powered on and within range. Check if the Bluetooth is enabled on your laptop. Try restarting both devices. Update your laptop’s Bluetooth drivers for better compatibility.
Can I Use Any Wireless Mouse With My Laptop?
Most wireless mice are compatible with laptops using Bluetooth or USB receivers. Always check the mouse’s connectivity type matches your laptop’s available options for seamless connection.
How Do I Fix Lagging Or Unresponsive Wireless Mouse?
Replace the mouse batteries or recharge it. Ensure no physical obstructions interfere with the signal. Update mouse drivers on your laptop. Try reconnecting or resetting the mouse.
Conclusion
Connecting a wireless mouse to your laptop is simple and quick. Just follow the steps carefully. Use the USB receiver or Bluetooth to link the devices. Ensure the mouse has fresh batteries or is charged. Once connected, your mouse will work smoothly.
This setup helps you work or play without wires. Enjoy the freedom and ease of a wireless mouse. Keep your laptop and mouse close for a strong connection. Now you can navigate your laptop with more comfort and control.